
 Cart (
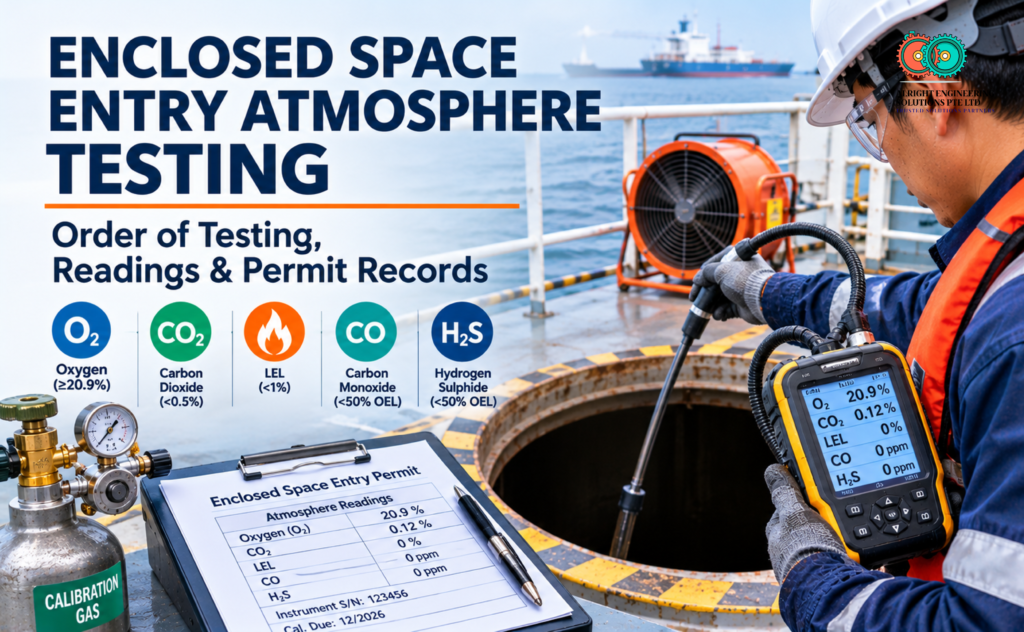
Enclosed Space Entry Atmosphere Testing: Order of Testing, Readings & Permit Records
In June 2022, three stevedores died in a cargo hold access space on the bulk carrier Berge Mawson at anchorage off Indonesia. The UK’s Marine Accident Investigation Branch found the hold atmosphere hadn’t been tested before anyone went in (MAIB report). Most ships do test, and most have a permit form. Where things go wrong is usually in the detail: which reading to trust first, where the sample came from, how long the hose took to deliver it, and what ended up on paper. This enclosed space entry atmosphere testing procedure walks through each step against IMO Resolution MSC.581(110), with the paragraph numbers so your SMS can reference them.
Before you test: the space, the meter and the permit
Testing starts before the detector is switched on. The space should be in the ship’s Enclosed Space Register, which MSC.581(110) expects to be kept on board and ashore, and a competent person should have assessed its hazards (4.1 to 4.3). That includes connected and adjacent spaces, the cargo history and anything that can consume oxygen or give off gas, such as organic cargoes, sludge or rusting steel.
Then check the instrument. Paragraph 7.2 asks for “properly calibrated equipment” used by trained people, with the manufacturer’s instructions strictly followed. In practice, check that the calibration label and certificate are in date and that the certificate lists every sensor, CO₂ included. Bump-test the meter before use (we’ve covered what a bump test can and can’t prove). Then check the pump, hose and probe, which is easiest done by drawing span gas through the full length of hose and confirming the meter responds. Pump flow and sample lines are also something we check during an onboard gas detector calibration.
Last, make sure the meter can measure what the risk assessment calls for. If CO₂ is a credible hazard and the unit is a 4-gas, you’ll need a CO₂ instrument alongside it. Our guide to 4-gas vs 5-gas detectors on ships covers the options.
Which order to test in
The “oxygen first, then flammables, then toxics” order is so familiar that most people assume the IMO requires it. It doesn’t. MSC.581(110) lists the entry criteria in paragraph 7.4 as oxygen, CO₂, flammables, then toxics, and the sample permit in Appendix 2 lists oxygen, flammables, toxics, then CO₂. Neither is presented as a mandatory sequence.
The well-known order comes from US shore regulations. OSHA’s confined space standard, 29 CFR 1910.146, requires testing for oxygen, then flammable gases and vapours, then toxic air contaminants (OSHA interpretation letter). It’s a US rule, but the reasoning behind it holds at sea. Most portable LEL sensors are catalytic beads, which need oxygen to burn the gas they’re measuring. In an oxygen-depleted space they can read low, so a reassuring %LEL figure means little until you know the oxygen level.
A modern multigas meter samples every channel at once, so the order is really about how you read the display. Look at oxygen first. If it’s below 20.9%, MSC.581(110) paragraph 6.5.3 treats the space as unsafe anyway, and the flammable reading on a catalytic sensor can’t be trusted. Only when oxygen is right do the LEL, CO₂ and toxic figures mean what they say.
Taking a reading you can trust
Most bad readings come from technique rather than the instrument.
Stop the ventilation first. Paragraph 7.6 says gas testing should be done with ventilation stopped and after conditions have stabilised. The sample permit suggests stopping it for about 10 minutes before the pre-entry tests. Testing with the fan running mostly measures the air the fan is pushing in.
Allow for the hose. A pumped sample takes time to travel up the tube. A common rule of thumb is at least one second per foot of tubing, roughly three seconds per metre, plus the sensor’s own response time. Some trainers use a more cautious two seconds per foot. On a 20-metre hose, that’s at least a minute before the display is showing gas from the far end. Your detector’s manual has the figure that applies to it, and it’s worth reading.
Wait for steady readings. Paragraph 7.4 asks for steady readings of every parameter. A number that’s still climbing or falling isn’t a result yet.
Test at several levels and openings. Gases stratify. CO₂ and H₂S are heavier than air and collect low, while methane rises, and pockets can sit behind frames or in bilge wells. Paragraph 7.2 asks for testing at as many levels and areas as necessary, and the resolution’s notes call for samples from several levels and through as many openings as possible. A single reading at the manhole isn’t a test of the space.
Pumped detectors make this practical. The K-600M 5-in-1 detector, for example, has a built-in pump rated for sampling through up to 20 metres of hose. Paragraph 7.3 also allows flexible hoses or fixed sampling lines to reach remote areas without anyone entering.
Even after a good test, paragraph 7.8 says oxygen-deficient areas may still exist and should always be suspected. That’s why the personal detector matters once people are inside.
Reading the numbers
These are the MSC.581(110) entry criteria and what each result means for the permit.
| Parameter | Entry criterion (7.4) | If it isn’t met |
|---|---|---|
| Oxygen | 20.9% by volume | Space is unsafe (6.5.3); ventilate and retest |
| Carbon dioxide | Below 0.5% by volume (5,000 ppm) | Ventilate and retest; no entry |
| Flammable gas or vapour | Below 1% of the LFL | Ventilate and retest; no entry |
| Toxic gases and vapours | Below 50% of the OEL | Ventilate and retest; no entry |
| Other gases from the risk assessment | Per the assessment | Use the right instrument or tubes; no entry until confirmed |
Paragraph 7.5 says that if any limit isn’t met, more ventilation should be applied and the space retested after a suitable interval. Paragraph 7.7 adds that oxygen and flammability readings tell you nothing about toxicity, so each gas has to be measured in its own right. If you want the background on the CO₂ limit, we explain what MSC.581(110) changed, and why a CO₂ channel’s zero needs care in how CO₂ sensors are calibrated.
During entry: retests and when to get out
The pre-entry test only describes the space at that moment. Paragraph 8.1 says the atmosphere should be tested frequently while the space is occupied, and people should leave if conditions get worse. Each person going in should wear a calibrated, tested personal detector that monitors oxygen, CO₂, flammables and toxic gases including CO (8.2). A clip-on single-gas unit such as a BELL MINI O₂ monitor is useful as a backup, but it doesn’t cover CO₂ or the other gases on its own.
Ventilation should stay on while people are inside (8.3). After a break, the space has to be retested, and the results verified and recorded, before anyone goes back in. Paragraph 8.4 asks for more frequent testing when conditions change, for example with hot work, a change in temperature, or sludge being disturbed during cleaning.
What the permit should record
MSC.581(110) says the master or a nominated responsible person issues the permit, and its validity is set by the risk assessment but should never be longer than eight hours (5.2). The sample permit in Appendix 2 becomes invalid if ventilation stops, and leaving the space unattended voids it too.
Appendix 2 has fields for each reading with “By” and “Time” next to them. It doesn’t have a field for the instrument used, and that’s the gap we’d close. A reading is only as good as the meter that took it, and without the serial number nobody can link the result to a calibration certificate later.
| Record | Why it matters |
|---|---|
| Space name and Register reference | Ties the permit to the right compartment and its hazards |
| Ventilation method and stop time | Shows the test followed 7.6 |
| Each reading, with time, level or location, and tester | Shows stratification was covered |
| Instrument make, model and serial number | Links the reading to a specific meter |
| Calibration due date and last bump test | Shows the meter was fit to use |
| Permit valid from and to | Shows it’s within eight hours |
| Retest readings after each break | Meets 8.3 |
| Attendant, communication and rescue arrangements | Shows the rest of the permit’s conditions were in place |
MSC.581(110) doesn’t set a retention period for permits, so your SMS decides how long they’re kept. When you check the certificate behind each meter, our guide to what PSC inspectors look for on marine calibration certificates covers the detail.
The testing sequence at a glance
- Confirm the space in the Register and complete the risk assessment.
- Check the meter’s calibration date, bump-test it, and check the pump and hose with gas.
- Ventilate, then stop ventilation and wait for conditions to settle (about 10 minutes, per Appendix 2).
- Sample through the hose, allowing for transit time, at several levels and openings.
- Read oxygen first, then CO₂, flammables and toxics, and wait for steady values.
- Compare against the 7.4 criteria; if any fail, ventilate and retest.
- Record every reading with time, location, tester and instrument serial number, then issue the permit for no more than eight hours.
- Restart ventilation, put personal detectors on each entrant, and retest after every break.
Keeping the meter honest
All of this depends on a detector that reads true. Our gas detector calibration service in Singapore tests alarm set points, pump flow and sample lines along with every sensor, on board alongside or at anchorage, and the certificate records as-found and as-left readings with the gas lot numbers used. If you’d like your detectors checked before a run of tank or hold entries, send us the instrument list and we’ll confirm what’s needed. The full range of portable units is on our portable gas detectors page.
The Berge Mawson report is a hard read because there was no test at all. On most ships the risk is quieter: a test that was done, but taken at the hatch with the fan running and the hose half-purged, and written up with no way of telling which meter took it.